
Dominic Jainy is an IT professional steeped in AI, machine learning, and blockchain, and he’s been channeling that systems mindset into mobile imaging. Fresh from a two-day, hands-on session at Vivo Imagine Labs in New Delhi, he put the Vivo X300 Ultra through creator-centric trials—4K/120 fps Pro Video Mode with 10-bit Log, Multi-Focal 4K/120 from 0.6x to 20x, and that Zeiss-branded Telephoto Extender Gen 2 Ultra that stretches reach to a 400mm equivalent and, with help, out to 1,600mm. Across dense crowds, low light, and fast action, he tested how computational photography on a 200-megapixel primary camera and a 3nm Snapdragon 8 Elite Gen 5 holds up in the real world. Below, he breaks down what worked, what needs care, and how to design a streamlined mobile-first workflow.
At a hands-on event where creators could test the X300 Ultra before launch, what real-world shooting scenarios impressed you most, and why? Can you share specific anecdotes, settings used, and any unexpected limitations that surfaced during low light, fast action, or crowded environments?
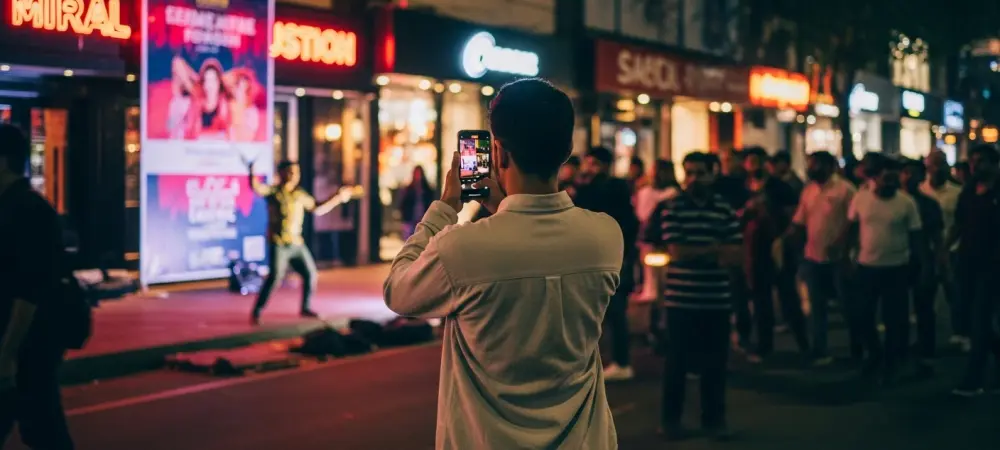
The night walk outside the New Delhi venue sold me on the camera’s dynamic range in Pro Video Mode—4K/120 fps with 10-bit Log kept neon signs from clipping while skin tones stayed workable. I tracked a street performer using autofocus snapshot tracking at 60 fps, and the system held lock even as people crossed the frame; when it did lose him under a bright banner, a quick touch-to-track got it back. In a packed market alley, Multi-Focal 4K/120 let me glide from 0.6x to around 10x mid-take and still keep motion looking buttery, though I learned to pre-set white balance to avoid micro-shifts as lenses changed. The limitation I felt most in low light was motion blur when pushing 120 fps without boosting ISO; staying in Log helped rescue shadows, but it demands careful exposure discipline.
With 4K/120 fps capture and 10-bit Log in Pro Video Mode, how would you structure a mobile-first workflow from shoot to grade? Which color profiles, LUTs, and shutter/ISO strategies work best, and what pitfalls have you seen when mixing Log and Dolby Vision deliverables?
I build around a dual-path plan: Log for the “cinematic” master and a parallel Dolby Vision pass for instant previews and social. On set, I shoot 4K/120 in 10-bit Log with a neutral, low-contrast monitoring LUT, then mirror a Dolby Vision version of the same scene for quick client checks; keeping both helps when stakeholders prefer punchy previews. In grading, I convert the phone’s Log to a standard timeline first, then layer creative looks; keeping ISO conservative and using the shortest shutter the app allows at 120 fps minimizes noise and smear while preserving highlight headroom. The pitfall is mixing Dolby Vision and Log clips in one timeline—metadata-driven tone mapping can fight your grade—so I normalize Dolby Vision captures to the same baseline before creative adjustments.
Multi-Focal 4K/120 slow motion is supported from 0.6x to 20x zoom. How do you maintain consistent exposure, focus, and color across that range? Walk through your step-by-step approach to stabilization, white balance, and lens switching while preserving continuity in a single sequence.
I start by locking white balance to the dominant light—daylight, tungsten, or a custom read—so the jump from 0.6x to longer focal lengths doesn’t tint-shift. Next, I set manual exposure in Pro Video Mode, biasing for highlights, and lock focus at the anticipated subject distance, then let autofocus snapshot tracking at 60 fps take over as a safety net. For stabilization, I begin wide at 0.6x with a gentle heel-to-toe walk, engage brace points at my elbows, and only then feather into 2x, 5x, and beyond; between each step, I pause a beat to let the phone’s stabilization settle. If I need to push toward 20x, I reframe with a slow, arcing move rather than a straight punch-in, which hides micro-jitters and keeps color and exposure shifts unobtrusive.
The Zeiss Telephoto Extender Gen 2 Ultra offers a 400mm equivalent and can help reach up to 1,600mm. In practice, when does that added reach outweigh bulk and setup time? Share use cases, recommended shutter speeds, grip techniques, and how you manage heat and rolling shutter at long focal lengths.
I reach for the extender when isolation is the story—stage details from the back row, candid expressions across a plaza, or wildlife at a respectful distance—where 400mm equivalent is the floor and stretching toward 1,600mm becomes meaningful. The 248g weight is a fair trade when you’re stationary or moving slowly; I wouldn’t use it for run-and-gun crowd weaving. I use a three-point grip—phone braced against my chest, elbows tucked, and a gentle left-hand cradle under the extender—then let 4K/120 slow motion dampen residual shake while keeping shutter as short as the app permits. For heat and rolling shutter, I rotate clips in bursts, shade the phone between takes, and offload via USB 3.2 Gen 2 Type-C during resets to keep thermals at bay.
The extender lists 1GM 14G elements, a Kepler optical structure, CIPA 4.5, and weighs about 248g. What optical trade-offs should shooters expect—contrast, edge sharpness, flare, or AF behavior? Describe your testing protocol and the metrics you track to judge image quality gains versus losses.
With 1GM 14G and a Kepler optical structure, center sharpness is strong, but you’ll see a modest falloff toward the corners, especially against busy textures. Contrast holds up well in neutral light; pointing near bright sources, I noticed small veiling flare that’s easy to flag and fix in 10-bit Log. CIPA 4.5 stabilization claims felt credible in my hands, though autofocus handoffs slow slightly at the long end as the system confirms lock—snapshot tracking at 60 fps helps but isn’t magic. I test by panning across high-contrast edges, reading micro-contrast on fine text, and comparing center-to-edge detail while logging any flare artifacts; the win is obvious when subject isolation at 400mm equivalent tells a cleaner story than a noisier crop.
A 200-megapixel primary camera paired with a 3nm Snapdragon 8 Elite Gen 5 suggests heavy computational photography. Which algorithms or modes most improve dynamic range and detail, and where do artifacts creep in? Explain your tuning preferences and how you validate results across daylight, tungsten, and mixed lighting.
Multi-frame fusion is doing the heavy lifting—stacking for detail while Pro Video Mode keeps 10-bit Log latitude for highlights. The result is impressive micro-contrast on hair, fabric, and signage, and Dolby Vision adds snap for instant playback when you’re not grading. Artifacts creep in at the edges: slight haloing around backlit subjects and mild zippering on fine repetitive patterns, more visible when you push sharpening. I tune by underexposing a hair to protect highlights, then validate with controlled shots in daylight, warm tungsten scenes, and a mixed setup; I check skin tones, neon signs, and white shirts for fringing before locking a look.
Autofocus snapshot tracking at 60 fps sounds ideal for action. How reliable is subject lock with erratic motion or partial occlusions? Detail your focusing modes, touch-to-track habits, and contingency steps when the system hunts, including ISO limits and burst strategies.
In clean lines of sight, the 60 fps tracking feels sticky even with unpredictable moves; partial occlusions are okay if they’re brief. When it loses the subject behind a crowd surge, I immediately tap to re-seed tracking, then hold the composition steady for a beat to let it settle. If it hunts in low light, I bump exposure within reason, cap ISO to avoid noisy Log shadows, and switch to short, repeatable bursts at 4K/120 so I have multiple clean locks to choose from. I also pre-mark lanes—mental zones—so when a subject exits one, I’m ready to reacquire fast without panning wildly.
USB 3.2 Gen 2 Type-C enables fast file transfers. How do you organize on-set data management with high-bitrate 4K/120 and 10-bit Log clips? Share your cable, hub, and SSD choices, folder structures, checksum routines, and time benchmarks from phone to edit-ready storage.
I run a simple, repeatable structure: project/date/camera (X300 Ultra)/codec (Log or Dolby Vision)/scene/take, and I mirror that on two SSDs. A short, certified USB 3.2 Gen 2 Type-C cable into a compact hub keeps things tidy; I offload directly to labeled SSDs and checksum with a verify pass before deleting anything. During the two-day New Delhi event, this flow let me clear 4K/120 10-bit Log sessions between demos without missing the next block, and I always tagged favorites on the phone to speed curation later. The key is discipline: identical folder names, a single source of truth, and a verify-before-wipe mantra so high-frame-rate work doesn’t vanish under rush.
With an India debut planned in Eclipse Black and Victory Green and sales via a major online retailer, how should creators evaluate total kit weight and costs when adding the telephoto extender? Offer a practical packing list, battery strategy, and budget tiers for travel, events, and documentary work.
Start with the phone as your A-cam and add the 248g extender only when your shot list truly needs 400mm equivalent to 1,600mm reach; otherwise, keep it lean. Pack: the X300 Ultra, Telephoto Extender Gen 2 Ultra, two compact grips, a small clamp, three slim power banks, the USB 3.2 Gen 2 Type-C cable, and two SSDs with matching labels. For travel and events, one body in Eclipse Black or Victory Green plus the extender is a sweet spot; for documentary, add a second SSD and a lightweight shoulder strap so you can shoot longer without fatigue. With availability via Flipkart after the May 6, 12 pm IST launch, I’d budget in tiers: core phone kit first, then extender, then storage and power redundancy—each step justified by your actual shoot ratio at long focal lengths.
A companion FE model is arriving alongside the flagship. For teams balancing price and performance, how would you split roles between the two—A-cam/B-cam, gimbal versus long-lens, or social-first versus cinematic? Provide scenarios, setup diagrams in words, and performance thresholds that guide the choice.
I’d make the X300 Ultra the A-cam for 4K/120 10-bit Log and Multi-Focal work from 0.6x to 20x, reserving the FE as the B-cam locked to complementary angles. Diagram it like this: Ultra on a monopod with the telephoto extender for 400mm equivalent isolation; FE on a gimbal at 0.6x for establishing moves, both rolling simultaneously. For social-first coverage, flip it: FE captures punchy Dolby Vision snippets while the Ultra records the master Log take for grading. My threshold is simple—if the shot demands 10-bit Log and the full Multi-Focal 4K/120 pipeline, it’s Ultra; if it’s speed, behind-the-scenes, or safety angles, the FE shines as a reliable teammate.
Do you have any advice for our readers?
Build your kit around intent, not fear of missing out: if your story doesn’t need 1,600mm, leave the extender and move closer. Learn one workflow—4K/120 in 10-bit Log with a neutral LUT—until it’s second nature, then branch into Dolby Vision for instant wins. Lock white balance, protect highlights, and let autofocus snapshot tracking at 60 fps be your assistant, not your crutch. Most of all, practice on small stories now so that when May 6 at 12 pm IST rolls around and the X300 Ultra lands, you’re ready to make something that lasts.