
Imagine a world where cybersecurity threats loom around every digital corner, and the need for skilled professionals to combat these dangers grows daily. Picture yourself stepping into this arena, armed with one of the most powerful tools in the industry, ready to test systems, uncover vulnerabilities, and safeguard networks. This journey begins with setting up a secure, isolated environment to learn and experiment without risking real-world systems. That’s where Kali Linux, a premier distribution for penetration testing, paired with VirtualBox, a versatile virtualization platform, comes into play. This guide offers a clear path to installing Kali Linux on VirtualBox, empowering anyone to dive into cybersecurity exploration with confidence.
The significance of this setup cannot be overstated. Kali Linux provides a vast array of pre-installed tools designed for security auditing and ethical hacking, making it an indispensable resource for professionals and learners alike. Meanwhile, VirtualBox allows users to run this powerful system within a virtual machine, ensuring that any mistakes or experiments remain contained and harmless to the host device. By following five straightforward steps, this guide will walk through the entire process—from downloading the necessary software to configuring a fully functional Kali environment—laying the foundation for a rewarding learning experience.
The beauty of this approach lies in its accessibility. Virtualization technology has democratized the learning of complex cybersecurity concepts, removing the need for expensive hardware or dedicated machines. Whether a beginner curious about ethical hacking or a seasoned professional sharpening skills, setting up Kali Linux on VirtualBox offers a safe sandbox to push boundaries. Let’s embark on this journey, unraveling each step to build a robust platform for cybersecurity training and beyond.
Unveiling Kali Linux on VirtualBox: A Gateway to Cybersecurity Exploration
Kali Linux stands as a cornerstone in the realm of cybersecurity, renowned for its comprehensive suite of tools tailored for penetration testing, digital forensics, and security research. Developed by Offensive Security, it has become the go-to operating system for professionals seeking to identify and mitigate vulnerabilities in systems and networks. The ability to simulate real-world attack scenarios or test defenses with precision makes it a critical asset in an era where data breaches can cost millions and reputations.
Pairing Kali Linux with VirtualBox elevates its utility by creating an isolated environment where experimentation carries no risk to the primary system. VirtualBox, a free and open-source virtualization tool, enables the creation of virtual machines that mimic physical hardware, allowing users to install and run Kali Linux as if it were on a separate device. This setup ensures that any misconfigurations, failed exploits, or system crashes remain contained, providing a safety net for learning and testing without fear of unintended consequences.
To achieve this powerful combination, the installation process is broken down into five manageable steps. These include downloading the required software, setting up a virtual machine, attaching the Kali Linux image, running the installer, and finally updating the system for optimal performance. Each phase builds on the last, guiding users through a seamless setup that transforms a standard computer into a cybersecurity lab. With this framework in mind, the path to mastering security tools becomes not just achievable, but also engaging and structured.
The Importance of Kali Linux in Cybersecurity Training
The roots of Kali Linux trace back to its origins as a specialized distribution built for security professionals by Offensive Security. Designed to replace BackTrack, its predecessor, Kali emerged as a refined platform packed with hundreds of pre-configured tools for tasks ranging from vulnerability scanning to password cracking. Its regular updates and community support ensure that it remains at the forefront of security testing, reflecting the latest threats and methodologies in an ever-evolving digital landscape.
Virtualization plays a pivotal role in making such a potent system approachable for learning purposes. By running Kali Linux within a virtual machine, users can test aggressive tools and scripts without jeopardizing their host operating system or network. This isolation is particularly valuable for newcomers who might inadvertently misconfigure settings or execute risky commands. Moreover, virtualization allows for snapshots—saved states of a system that can be restored instantly—offering a way to reset after experimental failures without starting from scratch.
Among virtualization options, VirtualBox stands out as a preferred choice for both beginners and experts due to its user-friendly interface and robust feature set. Its compatibility with multiple operating systems, coupled with the fact that it’s freely available, lowers the barrier to entry for those eager to explore Kali Linux. Additionally, VirtualBox supports extensive customization, enabling users to fine-tune resource allocation and network settings to match their needs. This flexibility, combined with its widespread adoption, makes it an ideal companion for diving into the intricacies of cybersecurity training.
Step-by-Step Guide to Installing Kali Linux on VirtualBox
Step 1: Downloading the Essential Software
The journey begins with gathering the necessary components to build the virtual environment. Start by visiting the official VirtualBox website to download the latest version of the software compatible with the host operating system. Next, head to the Kali Linux official site to obtain the ISO file, which serves as the installation image for the operating system. Ensuring these downloads come from trusted sources is critical to avoid corrupted files or security risks that could compromise the system.
Pro Tip: Ensure Compatibility
Before proceeding with the downloads, take a moment to verify that the host machine meets the minimum requirements for running VirtualBox and Kali Linux. A system with at least 4 GB of RAM and a processor supporting virtualization technology is recommended to prevent performance bottlenecks. Checking these specifications in advance saves time and frustration, ensuring a smoother installation process.
Warning: Verify Download Sources
It’s worth emphasizing the importance of sticking to official channels for obtaining software. Downloading from unofficial or third-party sites can expose the system to malware or tampered files, posing a significant security threat. Double-check the URLs and look for secure indicators like HTTPS to confirm authenticity, safeguarding the integrity of the setup from the outset.
Step 2: Setting Up a New Virtual Machine
With the software in hand, the next phase involves creating a virtual machine within VirtualBox to host Kali Linux. Open VirtualBox, click on the “New” button, and name the machine something identifiable like “Kali Linux.” Select Linux as the type and Debian (64-bit) as the version to align with Kali’s architecture. This step lays the groundwork for a dedicated space where Kali will operate independently of the host system.
Customization Insight: Optimize RAM and Storage
To ensure the virtual machine runs efficiently, allocate resources thoughtfully. Assigning between 2 to 4 GB of RAM, depending on the host’s capacity, strikes a balance between performance and host system stability. Additionally, create a virtual hard disk with at least 25 GB of storage to accommodate Kali’s tools and future updates. These adjustments prevent sluggishness and provide ample room for experimentation.
Helpful Resource: Shared Folders Setup
For seamless interaction between the host and guest systems, consider configuring shared folders during the setup. This feature allows files to be transferred easily, eliminating the need for cumbersome workarounds. Within VirtualBox settings, designate a folder on the host machine to be accessible from the virtual machine, enhancing workflow and productivity when managing data or scripts across environments.
Step 3: Attaching the Kali Linux ISO to the VM
Now that the virtual machine is ready, the Kali Linux ISO must be linked to it as a bootable medium. Navigate to the settings of the newly created machine in VirtualBox, head to the “Storage” section, and select the empty optical drive. Click the disk icon to choose a disk file, then locate and select the downloaded Kali ISO. Confirming these changes ensures the virtual machine will boot from this image when started.
Key Reminder: Double-Check ISO Selection
A small but crucial detail in this step is verifying that the correct ISO file has been selected. An incorrect file or an outdated version could lead to installation failures or compatibility issues. Take a moment to confirm the file path and name in the settings menu, avoiding unnecessary delays or errors during the boot process.
Step 4: Launching the VM and Running the Installer
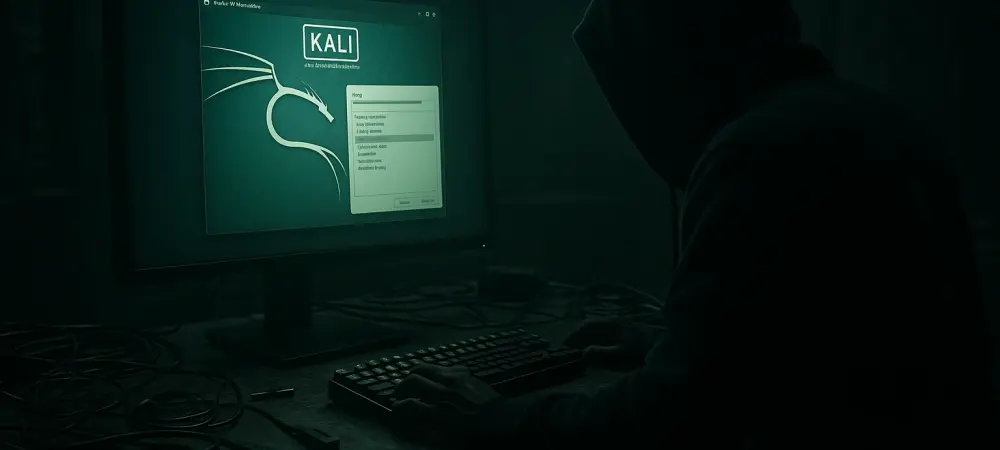
With everything in place, it’s time to power on the virtual machine and initiate the installation of Kali Linux. Select the machine in VirtualBox and click “Start” to launch it. The system will boot from the attached ISO, presenting the Kali Linux installation menu. Opt for the “Graphical Install” for a user-friendly experience, then follow the prompts to select language, location, keyboard layout, and user credentials.
Installation Tip: Choose the Right Desktop Environment
During the installation wizard, a choice of desktop environment will be offered, such as GNOME or XFCE. Selecting one that suits personal preferences or system resources can enhance usability. For lighter systems, XFCE might be more responsive, while GNOME offers a modern, polished interface. This decision shapes the day-to-day interaction with Kali, so choose wisely based on needs.
Post-Install Note: Install Guest Additions
After the installation completes, installing VirtualBox Guest Additions is highly recommended for an enhanced experience. This add-on improves graphics rendering, enables clipboard sharing, and supports better mouse integration between host and guest. Access this feature through the VirtualBox menu under “Devices” and follow the prompts to install, ensuring a more fluid and integrated setup.
Step 5: Updating and Configuring Your Kali Environment
The final step focuses on securing and optimizing the newly installed Kali Linux system. Upon first login, open a terminal and run commands to update the package lists and upgrade installed software. This ensures that all tools and security patches are current, protecting against known vulnerabilities and enhancing stability for practical use.
Best Practice: Regular Updates
Maintaining an up-to-date system is not a one-time task but a continuous commitment. Scheduling periodic updates through the terminal keeps Kali Linux equipped with the latest features and fixes. This habit is essential for security professionals, as outdated systems can become easy targets or fail to address emerging threats effectively.
Final Touch: Reboot for Stability
Once updates are complete, rebooting the virtual machine allows changes to take full effect. This simple action can resolve minor glitches and ensure that the system operates at its best. A quick restart after significant updates or configurations solidifies the setup, preparing the environment for immediate use in testing or learning scenarios.
Quick Recap of the Installation Process
For clarity, the five essential steps to install Kali Linux on VirtualBox can be summarized as follows. First, download both VirtualBox and the Kali Linux ISO from their official sources. Second, create a new virtual machine in VirtualBox with specifications tailored for Kali. Third, attach the downloaded ISO to the virtual machine as a bootable image. Fourth, start the machine and navigate through the Kali installer to set up the system. Finally, update and configure the environment to ensure it’s secure and ready for use. This methodical approach simplifies what might seem daunting, turning it into a series of achievable tasks.
Reflecting on this sequence, it becomes evident how each step builds logically toward a fully functional setup. The process is designed to be approachable, even for those with minimal technical background. By adhering to these guidelines, the complexity of virtualization and advanced operating systems melts away, revealing a straightforward path to harnessing powerful tools.
This recap serves as a reminder of the structure and simplicity embedded in the installation journey. Following these steps in order guarantees a robust foundation for exploring cybersecurity. With the virtual machine now operational, the focus shifts from setup to application, opening doors to countless possibilities in security training.
Beyond Installation: Leveraging Kali Linux for Growth and Learning
Once Kali Linux is installed on VirtualBox, the real adventure begins with its application in cybersecurity training and experimentation. This setup provides a perfect sandbox for constructing penetration testing labs, where simulated attacks on virtual networks or systems can be conducted without ethical or legal concerns. Such hands-on practice is invaluable for mastering tools like Metasploit or Wireshark, fostering skills that are directly applicable to real-world scenarios.
Furthermore, the virtualization landscape continues to evolve, with trends like nested virtualization and cloud-based labs gaining traction. These advancements allow for even more complex environments to be created within VirtualBox, enabling users to replicate enterprise-grade networks for testing. Staying abreast of these developments ensures that the learning curve remains dynamic, offering fresh challenges and methodologies to tackle over time.
However, challenges such as resource allocation or unexpected errors in virtualization settings may arise. Insufficient RAM or CPU power can slow down the virtual machine, while misconfigured network adapters might disrupt connectivity. Troubleshooting these issues often involves adjusting settings in VirtualBox or consulting community forums for specific fixes. Patience and persistence in addressing these hurdles transform potential setbacks into learning opportunities, refining technical expertise along the way.
Final Thoughts: Embark on Your Cybersecurity Journey with Kali Linux
Looking back, the process of installing Kali Linux on VirtualBox unfolded as a structured yet empowering endeavor, transforming a standard computer into a potent cybersecurity lab. Each step, from downloading software to fine-tuning the virtual environment, contributed to building a secure space for exploration. The significance of this achievement lay in the newfound ability to experiment without risk, a critical advantage in mastering the intricate world of security testing.
Beyond the installation itself, the journey opened pathways to deeper learning and skill development. With Kali Linux now operational, the next steps involved diving into its extensive toolkit, perhaps starting with basic vulnerability scans or network analysis. Exploring resources like Offensive Security’s training materials or community-driven tutorials could further accelerate growth, offering structured guidance for honing expertise.
As the digital threat landscape continues to expand, this setup positioned users at the forefront of defense readiness. Engaging with local cybersecurity groups or participating in capture-the-flag challenges became viable ways to apply newfound knowledge. Reflecting on this milestone, it was clear that the true value lay in the continuous pursuit of mastery, leveraging this virtual platform to stay ahead in an ever-changing field.