

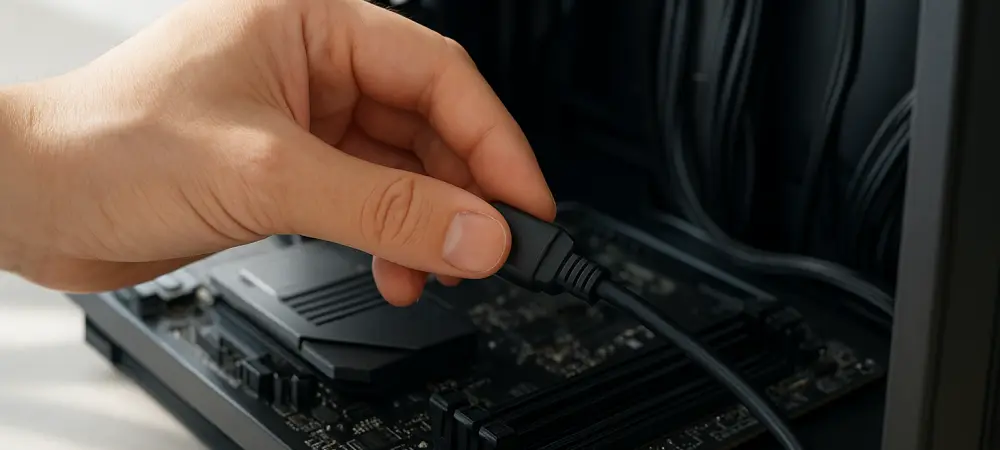
Navigating the technical differences between passive splitters and powered hubs is essential for maintaining signal integrity in systems with numerous USB devices. While high-performance processors and graphics cards often steal the spotlight in the world of custom PC building, the motherboard serves as the vital foundation that dictates a system’s true versatility. Many users overlook the array of internal pins and connectors scattered across the circuit board, assuming their connectivity is limited to the ports already visible on the outside of the case. By shifting focus toward these underutilized internal headers, enthusiasts can significantly boost their computer’s functionality and aesthetic appeal without the need for an expensive platform replacement. Typically, these headers are only used to connect the pre-installed ports on a computer case, leaving several high-speed data channels dormant. By employing a few strategic, low-cost accessories, system builders can redirect this hidden bandwidth to support a wider array of peripherals, advanced cooling systems, and the sophisticated lighting setups that modern custom builds now frequently require. This process transforms a standard machine into a highly specialized workstation.
Expanding Internal USB 2.0 Capacity and Power
One of the most frequent hurdles in contemporary PC assembly is the lack of available USB 2.0 headers. Modern components, such as liquid cooling pumps with integrated LCD screens, complex RGB controllers, and specialized fan hubs, all compete for the limited number of nine-pin connectors found on the motherboard. Because most standard boards only provide two of these headers, users often find themselves forced to choose between connecting their case’s front panel ports or their internal smart hardware. This dilemma becomes even more pronounced when using high-end controllers that require constant data communication with software suites for real-time monitoring. Without a dedicated connection, these devices often default to basic hardware modes, stripping away the premium features for which the user originally paid. Resolving this requires a deeper understanding of how data is multiplexed across the motherboard’s internal bus without saturating the controller’s limited bandwidth or causing thermal issues for the system chipset.
To solve this bottleneck, the internal USB hub is the most effective solution. These compact modules act as a power strip for your data, turning a single motherboard header into multiple connection points while remaining tucked away behind the motherboard tray for a clean look. However, it is vital to choose a hub that uses dedicated SATA power from the power supply rather than a passive splitter. This ensures that every connected device receives stable amperage, preventing the data dropouts or hardware malfunctions that occur when the motherboard’s limited 500mA output is spread too thin. High-quality hubs also incorporate circuitry to protect the motherboard from electrical surges, which is a common risk when multiple high-draw devices are daisy-chained together. By offloading the electrical burden to the power supply unit, the system maintains greater stability during heavy workloads. This approach allows for the seamless integration of various aesthetic and functional upgrades while keeping the internal cable management organized and efficient for better airflow.
Reclaiming Bandwidth Through Slot Plate Adapters
A common inefficiency in mid-to-high-end systems is the mismatch between a motherboard’s capabilities and the features of the computer case. Many motherboards feature two or more 19-pin USB 3.0 headers, but if a case only provides one cable, an entire high-speed data channel sits idle. This represents a significant waste of potential throughput that could be used for external drives, card readers, or other high-bandwidth accessories that demand more speed than standard USB 2.0 can provide. When a builder leaves these pins exposed and unused, they are essentially ignoring a five-gigabit per second data lane that is already paid for. In the current landscape of massive file sizes for creative projects and gaming assets, having extra high-speed access points at the rear of the machine can save substantial time during data transfers. Utilizing these headers does not require complex software configuration or BIOS modifications; it simply requires bridging the physical gap between the motherboard surface and the exterior of the chassis where the ports are actually accessible. The most practical way to reclaim this lost potential is by installing a slot plate adapter. This simple cable plugs directly into the unused internal header and routes to a bracket that fits into an empty PCIe slot at the back of the machine. This adds physical ports to the rear I/O area, effectively expanding the system’s external connectivity without necessitating a bulky external hub that consumes desk space. It is a cost-effective method that utilizes the hardware you already own to provide extra room for a growing collection of wired devices like high-resolution webcams or external solid-state drives. Furthermore, these adapters maintain the native speed of the motherboard’s controller because they do not rely on additional bridge chips that can introduce latency. By mounting these ports directly to the chassis frame, the physical connection remains secure and can withstand the frequent plugging and unplugging of mobile devices. This straightforward hardware addition maximizes the utility of the original purchase while providing a much cleaner and more professional appearance.
Managing Interference and Signal Integrity
While expanding USB 3.0 connectivity offers great benefits, it introduces a specific technical challenge regarding wireless peripheral performance. It is a well-documented issue that USB 3.0 signaling can create radio frequency interference in the 2.4GHz band, which is the same frequency used by most wireless mice, keyboards, and headsets. If a wireless receiver is plugged into a newly added USB 3.0 port, the user might experience erratic cursor movement, input lag, or frequent disconnections. This phenomenon occurs because the high-speed data transmission generates a broad spectrum of noise that can overlap with the narrow signals used by wireless dongles. As users add more ports to their systems, the density of this electrical noise increases, potentially compromising the responsiveness required for gaming or precision design work. Understanding this relationship is critical for anyone looking to expand their connectivity, as the physical proximity of a high-speed data cable to a wireless receiver can be the deciding factor between a seamless experience and a frustratingly unreliable one.
To maintain a high-performance experience, users should be strategic about which devices they plug into their expanded ports. These high-speed connections are best reserved for wired components like external hard drives or webcams where data transfer speed is the priority and electromagnetic interference is less of a concern. For wireless dongles, it is recommended to use legacy USB 2.0 ports or short extension cables to move the receiver away from the source of the interference, ensuring that the expanded USB potential does not come at the cost of peripheral reliability. This separation helps to isolate the sensitive radio frequency environment from the noisy high-speed data lanes. Additionally, using shielded cables for internal expansions can further mitigate the spread of interference within the case itself. By carefully mapping out which devices occupy which ports, a builder can achieve the maximum possible throughput for storage devices while preserving the low-latency communication needed for their input peripherals. This balanced approach ensures that the expanded capabilities of the motherboard do not inadvertently degrade the user experience.
Retrofitting Older Systems With Modern USB-C
As technology evolves, the USB-C standard has become the new benchmark for speed and convenience, yet many older or budget-friendly cases lack a native front-panel port for it. If a motherboard includes a Type-E or Key A header but the case does not support it, the builder is essentially sitting on a dead-end feature that offers no practical value. Rather than buying a completely new case to access this technology, which involves a time-consuming transfer of all components, users can bridge the gap by retrofitting their existing build with a dedicated adapter. This situation is common for those who upgraded their motherboard and CPU but kept a high-quality legacy chassis that they prefer for its aesthetics or internal volume. The presence of a Type-E header indicates that the motherboard is capable of ten or twenty gigabit speeds, which are crucial for modern mobile devices and high-performance docking stations. Unlocking this specific port allows the system to remain compatible with the latest generation of hardware without requiring a total overhaul of the computer’s physical structure. By using a Type-E to PCIe slot bracket, a fully functional, high-speed USB-C port can be brought to the back of the computer. This method is vastly superior to using external dongles or cheap adapters, as it maintains the native power delivery and data transfer specifications designed by the motherboard manufacturer. This approach is particularly valuable for users who want to keep their current hardware relevant from 2026 to 2028 and beyond, providing modern connectivity for the latest smartphones and external storage devices. These brackets are designed to fit into standard expansion slots, making them a universal solution for almost any tower configuration. Unlike external hubs that might split a single port’s bandwidth among multiple outlets, a direct header-to-port connection preserves the full integrity of the signal. This ensures that features like Power Delivery for fast charging or DisplayPort Alt Mode function as intended by the chipset designers. By making this small adjustment, an older system can achieve parity with the latest pre-built machines, extending the hardware lifecycle.
Strategic Planning for System Longevity
Before implementing these internal upgrades, a successful builder performed a thorough audit of the existing hardware. This began with a careful review of the motherboard manual, as physical pin layouts varied between brands, and some ports were proprietary rather than standard USB headers. Additionally, checking for physical clearance inside the chassis was necessary to mount internal hubs and route the required power cables without obstructing airflow or conflicting with other components. This proactive stance prevented common installation errors, such as accidentally bending pins or creating cable tension that could damage delicate PCB traces. Ensuring that the power supply had enough spare SATA connectors was another critical step in the preparation phase. By accounting for these variables early in the process, the expansion project moved forward smoothly, resulting in a system that was both more capable and more reliable. This methodical approach turned a confusing array of internal pins into a clearly defined map of connectivity options that could be exploited to their fullest extent.
Ultimately, unlocking the motherboard’s hidden potential moved the system toward an internalized connectivity strategy that prioritized organization and raw performance. By utilizing powered hubs and reclaiming dormant 19-pin headers, the build achieved a level of sophistication usually reserved for much more expensive enthusiast-grade platforms. These modifications proved that the most significant improvements to a computer’s utility did not require a massive financial investment but rather a better understanding of the versatile resources already present on the circuit board. Future considerations should involve monitoring the thermal output of the chipset as more devices are added to the internal bus, as well as staying informed about new PCIe-based expansion cards that could further enhance connectivity. The final result was a machine that not only met the demands of current software but was also prepared for the evolving peripheral landscape of the next several years. This transition from a stock configuration to a customized connectivity powerhouse highlighted the importance of hardware literacy in the modern era.