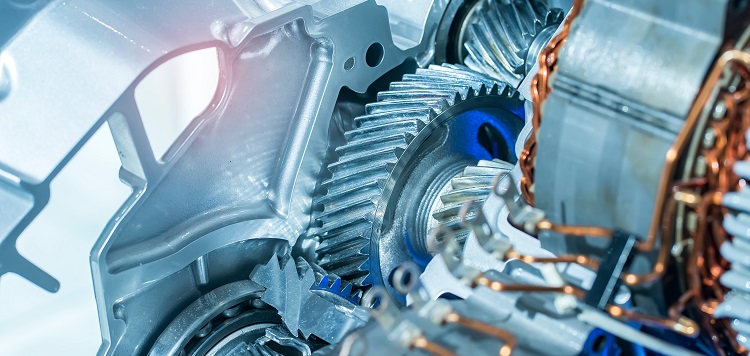
The automotive and manufacturing industries have undergone significant transformation in recent years with the advent of electric vehicles (EVs) and subsequent focus on improving electromobility. One of the key components in EVs is the electric motor, which has a significant impact on the overall performance of the vehicle. As a result, there is an increasing demand for precise and rapid inspection of the critical components in electric motors, namely hairpins and stators. ZEISS, a global leader in optical and optoelectronic technology, has launched a game-changing solution, the ScanBox for eMotors, to address these challenges.
Overview of the ZEISS ScanBox for eMotors
The ZEISS ScanBox for eMotors is an automated system designed to provide quick and accurate inspection and digitization of hairpins and stators. This innovative solution offers exceptional speed, precision, and versatility for inspecting both complete stators and multiple individual hairpins. ZEISS has integrated state-of-the-art technology, including the ATOS Q sensor and non-contact fringe projection technology, to capture detailed quality information in a short amount of time.
Inspection capabilities of the automated system
The ZEISS ScanBox for eMotors uses non-contact fringe projection technology, which allows for the precise acquisition of measurement points, even for delicate structures such as hairpins. The ATOS Q sensor captures high-resolution 3D data, enabling accurate measurement of complex geometries and subtle deviations. The automated system can inspect complete stators, including hairpins, as well as individual or multiple hairpins, with exceptional speed. Additionally, the system is capable of detecting surface defects such as scratches, dents, and discoloration.
Technology behind the non-contact fringe projection used by ATOS Q sensor:
The ATOS Q sensor is based on the principle of fringe projection. The system projects a fringe pattern onto the object being measured, and a camera captures the reflected light. The distortion of the fringe pattern caused by the object’s surface reveals information about the object’s shape and geometry. The high-speed cameras used by the ATOS Q sensor capture multiple fringe patterns simultaneously, which are then processed to generate a highly accurate 3D point cloud of the object’s surface.
Design of the ScanBox for eMotors for Automated, Full-Surface Scanning
The ZEISS ScanBox for eMotors is specifically designed for automated, full-surface scanning of complete stators and single or multiple hairpins without any prior surface treatment. The system uses a high-precision robot that moves the part being inspected to a fixed location where the ATOS Q sensor captures the necessary data. The software then generates a complete geometrical digital twin using 3D coordinates distributed over a wide area. This allows for quick and reproducible identification of component deviations and defects when compared to the CAD model.
Generating Geometrical Digital Twin Using 3D Coordinates
The software generates a geometrical digital twin by comparing the actual data with the nominal data from the CAD model. The 3D coordinates collected by the ATOS Q sensor are aligned, and the virtual point cloud is generated using advanced algorithms. The virtual twin can be compared to the nominal CAD model, and any deviations or defects can be quickly identified and analyzed.
User interface and program control using Kiosk Interface
The ZEISS ScanBox for eMotors features a user-friendly software interface called the Kiosk Interface. The interface allows easy programming and control of the automated system, making it accessible to operators of all levels. The program provides a step-by-step workflow that guides the operator through the inspection process, with the ability to accommodate both simple and complex inspection tasks, from individual measurements to series production monitoring.
Accommodation of simple and complex inspection tasks
The ZEISS ScanBox for eMotors has been designed to accommodate a wide range of inspection tasks, from simple to complex. The software allows for customization of inspection programs and workflows, making it ideal for both R&D and production environments. The flexible system architecture ensures that the system can be easily upgraded and integrated into existing production lines, without the need for costly modifications.
Comparison of actual and nominal data using CAD model
The system compares the actual data collected during the inspection with the nominal data from the CAD model. The comparison process identifies any deviations or defects and provides a comprehensive report, enabling the operator to quickly identify and analyze any issues. The system’s ability to quickly identify defects allows for the prompt resolution of problems, which reduces production downtime and minimizes costs.
Virtual Measuring Room (VMR) in the ZEISS Quality Suite
The ZEISS Quality Suite is an innovative tool that provides a simulated environment for the ZEISS ScanBox for eMotors. The Virtual Measuring Room (VMR) replicates the automated system’s hardware and software, complete with robot programming and kinematics of robot paths. The VMR provides a platform for training, optimization, and quality control, allowing operators to simulate various manufacturing scenarios in a safe and controlled environment.
The ZEISS ScanBox for eMotors is a game-changing solution for inspecting and digitizing hairpins and stators. The system’s speed, accuracy, and versatility make it an ideal solution for both R&D and production environments. The fully integrated system can be easily upgraded and integrated into pre-existing production lines without the need for costly modifications. By quickly identifying defects and analyzing issues, the system allows problems to be resolved promptly, reducing production downtime and minimizing costs. In summary, the ScanBox for eMotors is a critical tool that enables manufacturers to produce high-quality electric motors and contribute to the growth of the EV industry.

