
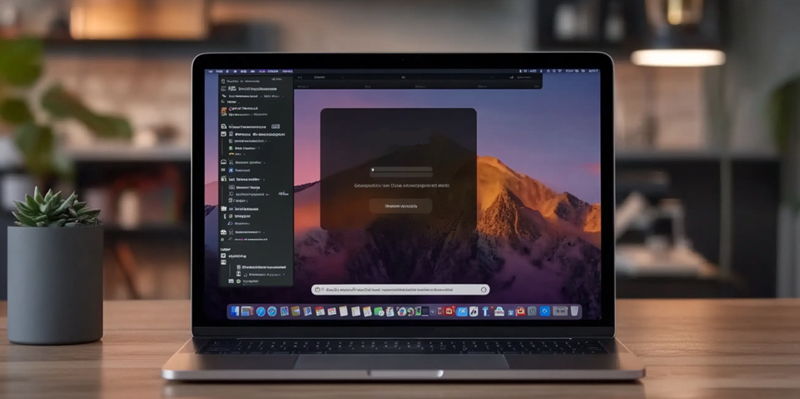
Efficiency is paramount for desktop users, particularly those who juggle multiple windows as part of their daily workflow. Historically, MacOS has been praised for its elegance, simplicity, and reliability, but it lacked a built-in window snapping feature, a staple in other operating systems. This glaring omission often left power users yearning for more advanced window management options. Fortunately, the latest MacOS update, known as Sequoia, has finally introduced built-in window snapping, alleviating one of the most notable drawbacks of the system. This feature is enabled by default, meaning users can start using it straight away without any configurations. However, the question arises: is the native window snapping functionality robust enough to meet the expectations of power users who demand more from their operating system?
What is Window Snapping?
Window snapping allows users to drag a window to the edge of the display, automatically resizing the window to occupy a predetermined portion of the screen. For instance, dragging a window to the right edge of the screen will make the window occupy the right half of the display. Similarly, dragging a window to the left edge will position the window on the left half of the display. When dragged to the top edge, the window will expand to occupy the full display. This feature improves multitasking efficiency by allowing users to quickly and easily arrange multiple windows on their screen. However, the default window snapping feature in MacOS Sequoia, accessible via a window button action, only supports snapping windows to the left or right halves of the screen.
Addressing the built-in limitations, MacOS Sequoia’s window snapping allows users to enjoy a heightened level of productivity by having multiple visible and accessible windows. This is especially beneficial when used in conjunction with other productivity features like Stage Manager. Though promising, the built-in feature may be somewhat basic for users who need finer control over window placements. Power users accustomed to more customization might find the default options a bit restrictive and long for more advanced configuration possibilities, something that third-party applications like Rectangle could potentially offer.
How to Use MacOS Window Snapping
Using the built-in window snapping feature on MacOS Sequoia is straightforward, requiring no additional setup since it’s activated by default. To utilize this functionality, simply click and hold the title bar of a window and drag it to one of the various snap zones on the screen. Dragging the window to the top center will make it full screen, while dragging it to the top left or top right will position it in the respective top quarter of the display. Dragging to the bottom center places the window in the center third of the display, and dragging to the bottom left or bottom right situates it in the respective bottom quarter of the screen. Similarly, dragging the window to the left or right edges will make it occupy the corresponding half of the display.
An alternative method for snapping windows involves hovering over the green maximize button located at the top left corner of any application window. By doing so, a dropdown menu will provide options for how the window can be arranged on the screen. While this built-in feature offers a variety of snapping options, it remains limited compared to more sophisticated window management software. Users who heavily rely on intricate window arrangements for their workflows might find this functionality somewhat lacking, despite its ease of use and out-of-the-box availability.
An Even Better Option
For users seeking more advanced window snapping capabilities, the app Rectangle presents a significant upgrade over MacOS Sequoia’s basic offering. Rectangle provides a plethora of additional window placements and features that surpass those of the built-in feature. The app not only allows for more customized snapping actions and finer control over window positioning but also includes features such as keyboard shortcuts, which streamline the process of arranging windows and significantly boost efficiency.
Rectangle permits users to exclude certain applications from snapping and even allows the screen to be divided into more complex arrangements, such as sixths, rather than just quarters. These features make it far more adaptable to the needs of power users who require precise and versatile window management solutions. The additional functionality provided by Rectangle highlights the limitations of the built-in MacOS snapping tool and demonstrates how third-party applications can fill in the gaps for those seeking enhanced performance and customization.
Installing Rectangle
To install Rectangle, you will need a MacOS device such as a MacBook Pro/Air or an iMac. Here’s a step-by-step guide to obtaining and setting up this useful application.
Obtain the Installer
First, open your default web browser and navigate to the Rectangle GitHub page. From there, you can download the app installer. Make sure to save the downloaded file to an easily accessible location on your system.
Set Up Rectangle
Once the download is complete, double-click on the downloaded file to open the installation window. Inside this window, you will see the Rectangle icon. Drag this icon into the Applications folder to complete the installation process. This step essentially moves the app into your system’s applications, making it easily accessible whenever needed.
Configuring Rectangle
After installing Rectangle, the next step involves configuring the app to work seamlessly with your MacOS settings. Proper configuration ensures that all features of the app function correctly and optimally.
Launch Rectangle
To launch Rectangle, open Launchpad and type “Rectangle” into the search bar. Click on the Rectangle launcher icon to open the application. When prompted, click “Open” to allow the app to run. This will initiate the setup process, during which you can customize the app to match your preferences.
Access System Preferences
For the app to function properly, you must grant it the necessary permissions. When the app opens, you’ll be prompted to click “Open System Preferences.” This will redirect you to the relevant settings page where you can manage app permissions and security settings.
Grant Permission to Rectangle
Inside the System Preferences window, click the lock icon located in the lower-left corner. You will be asked to enter your user password to unlock the settings. With Security & Privacy settings unlocked, find and click the checkbox associated with Rectangle. A pop-up window will appear where you should click “Recommended” to grant the proper permissions. After this, you can close both the System Preferences window and the Rectangle installer.
Set Up Rectangle
Upon granting the necessary permissions, the Rectangle configuration window will open. This is where you can set up and tailor each shortcut to your liking. The configuration options allow you to map out keyboard shortcuts and specific snapping actions, enabling you to tweak the app to suit your workflow perfectly.
Using Rectangle
Using the built-in window snapping feature on MacOS Sequoia is simple, as it’s enabled by default. To use this feature, click and hold the title bar of a window and drag it to one of the designated snap zones on your screen. When you drag the window to the top center, it will go full screen. Dragging it to the top left or right will place it in the respective top quarter of the screen. If you drag it to the bottom center, it will occupy the middle third of the display, whereas dragging it to the bottom left or right will situate it in the respective bottom quarter. Dragging the window to the left or right edges will make it cover that half of the screen.
Another way to snap windows is to hover over the green maximize button in the top left corner of any app window. This action brings up a dropdown menu that provides various arrangement options. Though this built-in feature offers multiple snapping choices, it falls short compared to advanced window management software. Users who need complex window configurations for their work might find this function lacking, even though it’s convenient and ready to use out-of-the-box.